


|
Assembly level: Skeleton modellingWe can now use these copied surfaces to create a solid feature and in turn parts to form the casing for our mouse. 11) Right click on moue_top.prt and select open 12) When open select the surface we have just copied and select edit> thicken. 13) Simply accept the default value for thickness by clicking the tick icon. 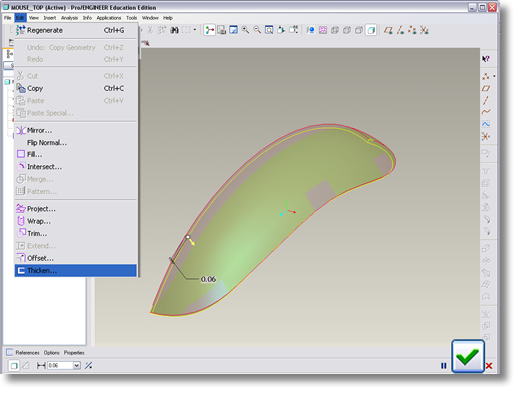
14) Now mirror the entire part by selecting the part name mouse_top.prt from the top of model tree and select the mirror icon 15) Use the datum plane MIRROR_REF as the plane to mirror about by selecting it from the model tree and complete the operation by clicking on the tick icon. 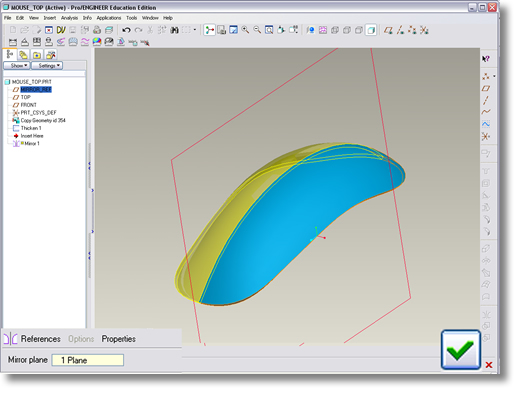
16) Save your changes and exit. Now repeat this process for the bottom half of the mouse. |
 |