


|
Assembly level: Profile - profileProfile-profile tutorialWe are now going to use the sketch we have just created and share its geometry to create a separate feature in a separate part with the same. A blank part file and an assembly file with the correct assembly constraints have been created for you to save you time. 7) Open the file ‘screen.asm’. The next step is to copy the geometry for the ‘screen.prt’ from the extruded hole we just created in ‘screen_insert.prt’. You will firstly need to specify which of these two parts you want the geometry to be copied from and to. Any geometry copied, will be copied into the ‘active’ part. In this instance, it is the ‘screen.prt we want to copy the geometry to, so. 8) Right click on ‘screen.prt’ in the model tree and click ‘activate’. 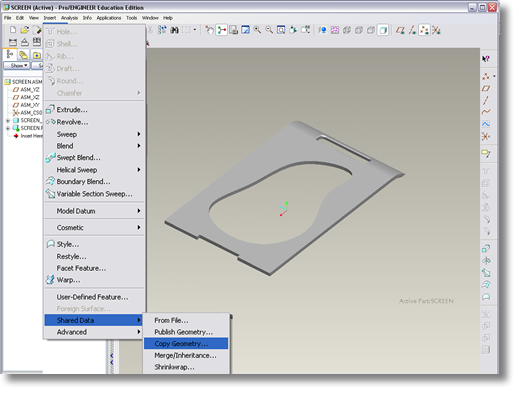
9) Next, click on the ‘insert’ menu at the top of the screen, select ‘shared data’ and then ‘copy geometry’. The dialogue box at the top of the screen is asking you what geometry you want to copy. 10) Click on ‘curve refs’ and ‘define’, Highlight ‘one by one’ and select the individual curves from the extrude sketch we created earlier. 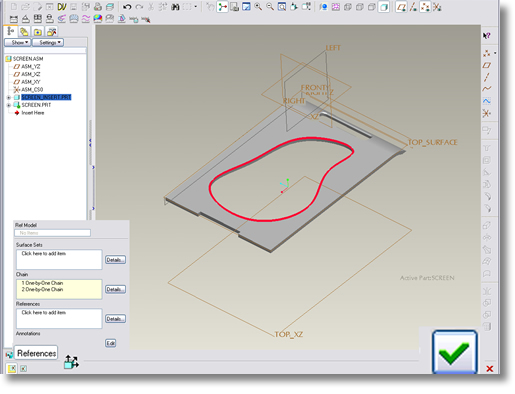
Remember you may need to hold down ‘Ctrl’ to select more than one curve. 11) Select ‘done’. We also need to copy a datum plane which we can use for the reference on which to sketch our new part . 12) Select from the list the option ‘misc refs’, and making sure ‘datum plane’ is selected, select the datum plane labelled ‘TOP_SURFACE’ from the model tree. 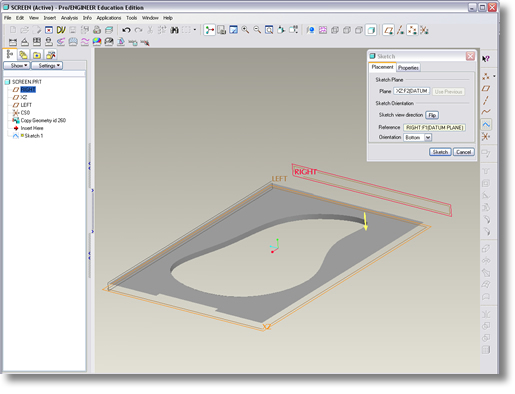
13) click ‘done’ and ‘ok’. Then save the assembly |
 |